How to select a hosting company

Category: Knowledge Base Page 1 of 2

Migrating to Dedicated Hosting: A Comprehensive Guide for Smooth Transition

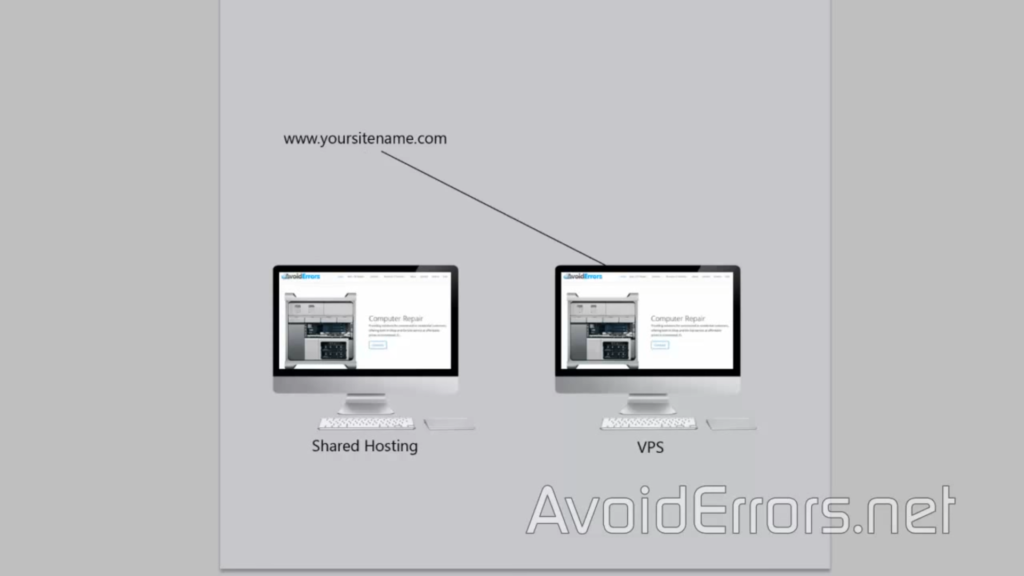
When your website outgrows the resources and performance capabilities of shared hosting or VPS hosting, it may be time to consider migrating to dedicated hosting. Dedicated hosting offers a higher level of control, performance, and security by providing a dedicated server exclusively for your website. However, the migration process requires careful planning and execution to ensure a smooth transition without any disruptions to your website’s availability. In this comprehensive guide, we will walk you through the steps involved in migrating to dedicated hosting and provide valuable tips for a successful transition.

Assess Your Needs and Choose the Right Hosting Provider

Before starting the migration process, evaluate your website’s requirements, including resource needs, anticipated traffic growth, and specific server configurations. Research and choose a reliable and reputable dedicated hosting provider that aligns with your needs and offers excellent support.

Backup Your Website and Database

Before proceeding with any migration, it is crucial to create a backup of your website files and databases. This ensures that you have a copy of your data in case of any unforeseen issues during the migration process.

Set Up the Dedicated Server

Work with your hosting provider to set up and configure the dedicated server. This involves choosing the appropriate server specifications, operating system, and control panel. Opt for a managed dedicated hosting solution if you prefer the hosting provider to handle server management tasks.

Transfer Website Files

To migrate your website to the dedicated server, you need to transfer your website files. This can be done using various methods such as FTP (File Transfer Protocol), SFTP (Secure File Transfer Protocol), or SSH (Secure Shell). Connect to your dedicated server using an FTP client, and upload your website files to the appropriate directory.

Migrate Databases

If your website relies on a database, you will need to migrate the database as well. Export the database from your previous hosting environment and import it into the dedicated server’s database management system. This can typically be done using tools like phpMyAdmin or the command line.

Update Configuration Settings

Once your website files and databases are transferred, review and update configuration settings to ensure they are compatible with the new dedicated server environment. This may include updating database connection settings, file paths, and any other server-specific configurations.

Test Website Functionality

Before making the final switch to the dedicated server, thoroughly test your website’s functionality on the new environment. Check for any broken links, missing files, or database connection issues. This will help identify and address any compatibility issues before going live.

Point DNS to the New Server

To direct traffic to the dedicated server, update the DNS (Domain Name System) records of your domain. This involves changing the nameservers or updating the A record to point to the IP address of the dedicated server. DNS propagation may take some time, so plan for a potential downtime during this period.

Monitor and Optimize Performance

After migrating to dedicated hosting, closely monitor the performance of your website. Utilize server monitoring tools to track resource usage, server uptime, and response times. Optimize your website and server settings if necessary to ensure optimal performance.

Maintain Regular Backups

As an ongoing practice, regularly backup your website and databases on the dedicated server. This ensures that you have up-to-date copies of your data and can quickly restore them if needed.

Seek Professional Assistance if Needed

If you are unsure about the migration process or encounter any technical challenges, don’t hesitate to seek professional assistance from your hosting provider or a knowledgeable IT professional. They can provide guidance and support to ensure a successful migration.

source: youtube.com/@teksyndicate

Migrating to dedicated hosting requires careful planning, preparation, and execution. By following this comprehensive guide, you can ensure a smooth and seamless transition to a dedicated server environment. Remember to assess your needs, choose a reliable hosting provider, backup your data, transfer website files and databases, update configuration settings, test website functionality, update DNS records, monitor performance, and maintain regular backups. With proper planning and execution, migrating to dedicated hosting can provide your website with enhanced performance, control, and security, allowing it to thrive in a dedicated server environment.

Migrating from Shared Hosting to VPS Hosting: A Step-by-Step Guide

Migrating from shared hosting to VPS (Virtual Private Server) hosting can be a significant milestone for your website. It offers increased control, performance, and scalability. However, the migration process can seem intimidating if you’re unfamiliar with the steps involved. In this step-by-step guide, we will walk you through the process of migrating from shared hosting to VPS hosting, ensuring a smooth and successful transition.

Step 1: Evaluate Your Hosting Needs

Before initiating the migration, assess your hosting requirements. Determine the resources your website needs, such as CPU, RAM, storage, and bandwidth. This evaluation will help you select the appropriate VPS hosting plan that meets your needs and allows room for future growth.

Step 2: Choose a VPS Hosting Provider

Research and select a reliable VPS hosting provider that aligns with your requirements. Consider factors such as uptime guarantees, customer support, server locations, scalability options, and pricing. Read reviews and compare different providers to make an informed decision.

Step 3: Set Up Your VPS Hosting Environment

Once you have chosen a provider, sign up for a VPS hosting plan. The hosting provider will provide you with login credentials and instructions to access your VPS server. Familiarize yourself with the control panel and management tools provided by the hosting provider.

Step 4: Back Up Your Website

Before migrating, it’s crucial to back up your website files, databases, and any other related data. This ensures that you have a copy of your website that can be restored if anything goes wrong during the migration process. Most hosting providers offer backup tools or plugins that simplify this process.

Step 5: Transfer Your Website Files

Next, transfer your website files from the shared hosting server to the VPS server. There are several methods to accomplish this:

  • FTP/SFTP: Use an FTP client (such as FileZilla) to connect to both your shared hosting account and VPS server. Download the website files from the shared hosting account and upload them to the appropriate directory on the VPS server.
  • File Manager: If your shared hosting control panel provides a file manager, you can compress your website files into a single archive (e.g., ZIP) and download it. Then, upload the archive to your VPS server and extract the files.
  • SSH: If you are comfortable with command-line interfaces, you can use Secure Shell (SSH) to connect to both servers and transfer files using commands like SCP or rsync.

Step 6: Migrate Your Databases

If your website relies on databases (e.g., MySQL), you need to migrate them as well. Export your databases from the shared hosting server and import them into the database server on your VPS. Use tools like phpMyAdmin or command-line utilities like mysqldump and MySQL shell to export and import the databases.

Step 7: Update Configuration Settings

Review your website’s configuration files (such as wp-config.php for WordPress) and update the necessary settings to reflect the new server details. Update database connection settings, file paths, and any other relevant configurations to ensure your website functions correctly on the VPS server.

Step 8: Test and Verify Your Website

Before updating DNS records, it’s essential to test your website on the VPS server to ensure everything is working as expected. Access your website using the temporary URL or IP address provided by the hosting provider. Test all functionalities, links, and forms to confirm that your website operates correctly.

Step 9: Update DNS Records

Once you are satisfied with the functionality of your website on the VPS server, it’s time to update your domain’s DNS records. Log in to your domain registrar’s website or contact your domain provider to update the nameservers or DNS settings to point to your new VPS server.

Step 10: Monitor and Optimize

After the migration, closely monitor your website’s performance, resource usage, and user feedback. Optimize your VPS server settings, implement caching mechanisms, and consider content delivery networks (CDNs) to further improve performance and user experience.

source: youtube.com/@Avoiderrors

Migrating from shared hosting to VPS hosting is an important step for website owners seeking more control, performance, and scalability. By following this step-by-step guide, you can ensure a successful migration process. Remember to evaluate your hosting needs, choose a reliable provider, back up your website, transfer files and databases, update configuration settings, test your website, update DNS records, and continuously monitor and optimize your VPS hosting environment. With careful planning and execution, your website will thrive on the enhanced capabilities offered by VPS hosting.

How to Set Up and Configure Your VPS Hosting Environment

Setting up and configuring a VPS hosting environment can seem like a daunting task, especially if you are new to virtual private servers. However, with the right guidance and knowledge, the process becomes much more manageable. In this article, we will walk you through the steps to set up and configure your VPS hosting environment effectively.

Step 1: Choose a Reliable VPS Hosting Provider

The first step in setting up your VPS hosting environment is selecting a reputable hosting provider. Look for providers that offer reliable hardware, excellent customer support, and a variety of plans to suit your needs. Compare features, pricing, and user reviews to make an informed decision.

Step 2: Select the Right Operating System

Once you have chosen a hosting provider, you will need to select the operating system (OS) for your VPS. Popular options include Linux distributions like Ubuntu, CentOS, and Debian, as well as Windows Server for Windows-based environments. Consider your familiarity with the OS and the requirements of your website or application when making your choice.

Step 3: Provision Your VPS

After selecting the OS, your hosting provider will provision your VPS. This involves allocating the necessary resources such as CPU, memory, storage, and bandwidth to your virtual server. The provisioning process may take a few minutes or longer, depending on the provider.

Step 4: Access Your VPS

Once your VPS is provisioned, you will need to access it. Most hosting providers provide a control panel or a web-based interface to manage your VPS. Additionally, you can connect to your VPS using secure shell (SSH) for Linux-based servers or Remote Desktop Protocol (RDP) for Windows-based servers.

Step 5: Update and Secure Your VPS

Immediately after gaining access to your VPS, it is crucial to update the system to ensure it is running the latest software versions and security patches. Use the package manager for your chosen OS to update all installed packages.

Next, enhance the security of your VPS by changing the default passwords, disabling root or administrator remote login, and configuring a firewall to allow only necessary incoming connections. Regularly install security updates and consider implementing additional security measures such as fail2ban, intrusion detection systems, or virtual private networks (VPNs).

Step 6: Install and Configure Necessary Software

Depending on your website or application requirements, you will need to install and configure the necessary software on your VPS. This may include a web server like Apache or Nginx, a database server like MySQL or PostgreSQL, and any additional software frameworks or tools required by your website or application.

Follow the documentation or tutorials provided by the software developers or hosting provider to correctly install and configure the software. Ensure that you optimize the software settings for performance and security, taking into account the resources available on your VPS.

Step 7: Set Up Domain and DNS

To make your website accessible, you will need to set up your domain and configure the domain name system (DNS) settings. This involves registering a domain name and pointing it to your VPS’s IP address. Your hosting provider should provide instructions or a control panel to help you manage your domain and DNS settings.

Step 8: Configure Backup and Monitoring

Implementing regular backups and monitoring is essential for the reliability and security of your VPS hosting environment. Set up automated backup systems to create regular backups of your data and configurations. Consider utilizing off-site storage or cloud backup solutions for added protection.

Implement monitoring tools to track the performance, resource usage, and uptime of your VPS. This helps you identify potential issues and take timely actions to optimize and maintain your hosting environment.

Step 9: Test and Optimize

Before launching your website or application, thoroughly test its functionality, performance, and security on your VPS. Perform load testing to ensure it can handle expected traffic levels. Monitor its performance and make necessary optimizations to enhance speed and responsiveness.

Regularly review your VPS configuration and make adjustments as needed. Stay updated with the latest security best practices and software updates to protect your VPS from vulnerabilities.

source: youtube.com/@TonyTeachesTech

Setting up and configuring your VPS hosting environment requires careful planning and execution. By following these steps, you can establish a reliable and secure VPS hosting environment to host your website or application. Remember to choose a reputable hosting provider, secure your VPS, install necessary software, configure domains and DNS, implement backup and monitoring systems, and continuously test and optimize your VPS for optimal performance.

How to Scale Your Website on a Shared Hosting Plan

Scaling a website is a crucial step in accommodating increased traffic, improving performance, and ensuring a positive user experience. While shared hosting may have resource limitations compared to other hosting options, it is still possible to scale your website effectively within a shared hosting plan. In this article, we will explore the various strategies and best practices to scale your website on a shared hosting plan.

Optimize Your Website

Before scaling your website, it’s essential to optimize it for maximum efficiency. This includes:

  • Compressing and optimizing images to reduce file sizes.
  • Enabling browser caching to store static files locally on visitors’ devices.
  • Minifying CSS and JavaScript files to reduce their size.
  • Implementing caching mechanisms, such as using a content delivery network (CDN) or a caching plugin, to store and serve static content.

Use a Content Delivery Network (CDN)

A CDN can significantly improve the performance of your website by caching and delivering your content from servers located strategically around the world. This reduces the load on your shared hosting server and improves page load times for visitors across different geographical locations.

Enable GZIP Compression

Enabling GZIP compression on your shared hosting server can reduce the size of files sent to visitors’ browsers, resulting in faster page load times. Most shared hosting providers offer GZIP compression as a built-in feature or can assist you in enabling it.

Opt for a Performance-Oriented Theme/Framework

Choose a lightweight and performance-oriented theme or framework for your website. Avoid heavy themes with excessive features and functionalities that can slow down your site. Opt for themes that are optimized for speed and follow best practices for performance.

Implement Caching

Caching can significantly improve the performance of your website. Many shared hosting providers offer caching solutions, such as server-level caching or plugins like WP Super Cache or W3 Total Cache. Implementing caching can reduce the server load and speed up your website.

Utilize a Content Delivery Network (CDN)

Integrating your shared hosting plan with a CDN can distribute your website’s static files to servers worldwide, reducing the load on your hosting server and improving global page load times. Many CDN providers offer easy integration options and have plugins available for popular CMS platforms.

Optimize Your Database

Regularly optimize your website’s database to improve its performance. This includes removing unnecessary data, optimizing database tables, and using an efficient database management system.

Monitor Resource Usage

Keep an eye on your website’s resource usage, such as CPU, memory, and bandwidth. Many shared hosting providers offer resource monitoring tools or provide resource usage data in their control panels. By monitoring resource usage, you can identify potential bottlenecks and take necessary actions to optimize and scale your website.

Utilize Caching Plugins

Caching plugins can store static versions of your website’s pages, reducing the load on your shared hosting server. Popular caching plugins like WP Rocket, W3 Total Cache, or WP Super Cache offer features such as page caching, object caching, and minification to improve performance.

Consider Upgrading to a Higher Shared Hosting Plan

If your website continues to grow and experiences increased traffic beyond the capabilities of your current shared hosting plan, consider upgrading to a higher-tier shared hosting plan. This can provide you with additional resources and better performance while remaining within the shared hosting environment.

Optimize Database Queries

Review and optimize your website’s database queries to ensure they are efficient and not putting unnecessary strain on your shared hosting server. Analyze slow queries and consider optimizing them, adding indexes where necessary, or using query caching techniques.

Leverage Browser Caching

Configure your shared hosting server to instruct visitors’ browsers to cache static resources like images, CSS, and JavaScript files. This way, returning visitors don’t need to download these files again, resulting in faster page load times.

Utilize a Load Balancer

If your shared hosting provider offers load balancing capabilities, consider implementing a load balancer to distribute traffic evenly across multiple servers. This can help handle increased traffic and improve the overall performance of your website.

Enable Opcode Caching

Opcode caching can significantly improve the performance of PHP-based websites. It stores precompiled PHP code in the server’s memory, reducing the time taken to execute PHP scripts. Check if your shared hosting provider supports opcode caching and enable it if available.

Consider a Virtual Private Server (VPS) Hosting

If your website continues to grow and you require more control and resources, consider upgrading to a VPS hosting plan. VPS hosting provides a dedicated portion of a server with more resources and greater scalability than shared hosting, allowing you to scale your website more effectively.

source: youtube.com/@hostgatorUS

While shared hosting may have some resource limitations, there are several strategies and best practices you can implement to scale your website effectively within a shared hosting plan. By optimizing your website, utilizing caching techniques, integrating with a CDN, and monitoring resource usage, you can improve performance, handle increased traffic, and provide a positive user experience. If your website continues to outgrow shared hosting, upgrading to a higher-tier shared hosting plan or considering VPS hosting can offer more resources and scalability.

How to Migrate Your Website to a Shared Hosting Plan

Migrating your website to a shared hosting plan can be a smooth and seamless process if you follow the right steps. Whether you’re starting a new website or looking to switch hosting providers, moving your site to a shared hosting plan can offer affordability, ease of use, and reliable performance. In this article, we’ll guide you through the step-by-step process of migrating your website to a shared hosting plan.

How to Migrate Your Website to a Shared Hosting Plan
source: pexels.com/@tranmautritam

Choose a Reliable Shared Hosting Provider

The first step is to select a reputable shared hosting provider that meets your requirements in terms of pricing, features, and customer support. Take the time to research different providers, read customer reviews, and compare their hosting plans before making a decision.

Backup Your Website

Before making any changes, it’s essential to create a backup of your website. This ensures that you have a copy of all your files and databases in case anything goes wrong during the migration process. You can use a plugin or the backup functionality provided by your current hosting provider to create a backup.

Set Up Your Shared Hosting Account

Once you’ve chosen a shared hosting provider, sign up for an account and set it up. The provider will give you the necessary details, including nameservers, to configure your domain.

Upload Your Website Files

Next, connect to your new shared hosting account using FTP (File Transfer Protocol) or a file manager provided by your hosting provider. Upload your website files from your backup to the appropriate directory on the shared hosting server.

Import Your Database

If your website uses a database, you’ll need to export it from your previous hosting provider and import it into your new shared hosting account. Use a tool like phpMyAdmin or a similar database management tool provided by your hosting provider to perform the export and import process.

Update Configuration Settings

Review your website’s configuration settings, such as database connection details and file paths, to ensure they match the settings of your new shared hosting account. Make any necessary updates to ensure your website functions correctly in the new environment.

Test Your Website

Before updating your domain’s nameservers, it’s essential to test your website on the new shared hosting server. Use the temporary URL or the IP address provided by your hosting provider to access your website and make sure everything is working correctly.

Update DNS Settings

Once you’ve confirmed that your website is functioning properly on the new shared hosting account, it’s time to update your domain’s DNS (Domain Name System) settings. Log in to your domain registrar’s control panel and change the nameservers to those provided by your shared hosting provider. This step may take a few hours to propagate across the internet.

Monitor and Troubleshoot

After updating the DNS settings, monitor your website closely for any issues or errors. Check different pages, forms, and functionalities to ensure everything is working as expected. If you encounter any problems, reach out to your new hosting provider’s support team for assistance.

Cancel Your Previous Hosting Account

Once you’re confident that your website is fully functional on the new shared hosting plan, you can cancel your previous hosting account. However, it’s always a good idea to keep a backup of your previous hosting account’s files and databases for a certain period, just in case you need to refer to them.

source: youtube.com/@dreamhost

By following these steps, you can successfully migrate your website to a shared hosting plan. However, keep in mind that the complexity of the migration process may vary depending on your website’s size, complexity, and the platform it’s built on. If you’re unsure about any aspect of the migration, it’s best to consult with your new hosting provider’s support team for guidance and assistance.

Common Myths About Shared Hosting Debunked

Shared hosting is one of the most popular types of hosting plans available today, but it’s also one of the most misunderstood. There are many myths surrounding shared hosting that can prevent website owners from making an informed decision when it comes to selecting a hosting plan. In this article, we’ll debunk some of the most common myths about shared hosting.

Myth 1: Shared Hosting is Unreliable

One of the most common myths about shared hosting is that it’s unreliable. Some people believe that since you’re sharing resources with other websites on the same server, your website’s performance will suffer. However, this is not necessarily true. Reputable web hosting providers allocate resources effectively to ensure that all websites on the same server have equal access to resources.

Myth 2: Shared Hosting is Not Secure

Another common myth about shared hosting is that it’s not secure. While it’s true that you’re sharing a server with other websites, a reputable web hosting provider will take necessary security measures to protect all websites on the server. This includes measures such as firewall protection, malware scanning, and regular updates to server software to ensure that all security vulnerabilities are patched.

Myth 3: Shared Hosting is Slow

Another myth about shared hosting is that it’s slow. While it’s true that shared hosting can be slower than dedicated hosting or VPS hosting, the speed of your website depends on several factors such as website optimization, server configuration, and the web hosting provider. With a reputable web hosting provider, shared hosting can be just as fast as any other hosting plan.

Myth 4: Shared Hosting is Only for Small Websites

Many people believe that shared hosting is only suitable for small websites with low traffic. However, shared hosting plans can support websites of all sizes, provided that the web hosting provider offers sufficient resources and efficient allocation of those resources.

Myth 5: Shared Hosting is Difficult to Manage

Another myth about shared hosting is that it’s difficult to manage. However, web hosting providers typically offer user-friendly control panels that make it easy to manage your website, even if you don’t have much technical expertise. Additionally, many web hosting providers offer support and guidance to help you manage your website effectively.

Myth 6: Shared Hosting is Not Customizable

Some people believe that shared hosting is not customizable. However, with a reputable web hosting provider, you can customize your hosting plan to suit your needs. This includes options such as adding additional resources, upgrading to a VPS hosting plan, or even migrating to a dedicated server if needed.

Myth 7: Shared Hosting is Unscalable

Another myth about shared hosting is that it’s not scalable. However, with a reputable web hosting provider, you can easily scale your website as your business grows. This includes adding additional resources such as storage space, RAM, or CPU power, as well as upgrading to a higher tier hosting plan if needed.

Shared hosting is a reliable, secure, and customizable hosting plan that can support websites of all sizes. While there are some myths surrounding shared hosting, it’s important to choose a reputable web hosting provider that offers efficient allocation of resources, robust security measures, and a user-friendly control panel. By selecting a reputable web hosting provider, you can ensure that your website is fast, secure, and scalable.

How to Migrate Your Website from Shared Hosting to Another Type of Hosting

Migrating your website from shared hosting to another type of hosting can be a daunting task, but with careful planning and execution, you can ensure a smooth transition without experiencing any downtime or data loss. Whether you’re upgrading to a VPS or dedicated hosting plan, or moving your website to the cloud, the following guide will provide you with the steps you need to take to migrate your website from shared hosting to another type of hosting.

Step 1: Choose a New Hosting Provider

The first step in migrating your website from shared hosting is to choose a new hosting provider that offers the type of hosting you need. Consider factors such as price, scalability, security, and reliability when choosing a new hosting provider.

Step 2: Choose a Migration Method

There are several ways to migrate your website from shared hosting to another type of hosting. The most common methods include:

  • Manual migration: This involves downloading your website files and database from your shared hosting account, and then uploading them to your new hosting account.
  • Automated migration: Many hosting providers offer automated migration tools that can move your website from shared hosting to their platform with just a few clicks.
  • Hire a professional: If you’re not comfortable with manual or automated migration, you can hire a professional to handle the migration for you.

Step 3: Back Up Your Website Files and Database

Before you start the migration process, it’s essential to back up your website files and database to ensure that you don’t lose any data during the migration. Most hosting providers offer backup tools that you can use to back up your website.

Step 4: Set Up Your New Hosting Account

Once you’ve chosen a new hosting provider and migration method, it’s time to set up your new hosting account. This involves creating a new account with your new hosting provider and setting up any necessary hosting features.

Step 5: Transfer Your Website Files and Database

If you’re using a manual migration method, you’ll need to transfer your website files and database from your shared hosting account to your new hosting account. You can use FTP (File Transfer Protocol) or a file manager to transfer your website files, and a database management tool to transfer your database.

If you’re using an automated migration tool, the tool will handle the migration for you.

Step 6: Test Your Website

Once you’ve transferred your website files and database, it’s essential to test your website to ensure that everything is working correctly. Check that all links and images are working, and that your website is functioning as expected.

Step 7: Update Your Domain Name Server (DNS)

Once you’ve confirmed that your website is working correctly, it’s time to update your domain name server (DNS) to point to your new hosting account. This process can take up to 48 hours to complete, so it’s essential to plan for this in advance.

Step 8: Cancel Your Shared Hosting Account

Once you’ve confirmed that your website is working correctly on your new hosting account, you can cancel your shared hosting account. Make sure to check with your shared hosting provider to ensure that you’re not locked into a contract or will be charged any cancellation fees.

source: youtube.com/@Emit.Reviews

Migrating your website from shared hosting to another type of hosting can be a challenging task, but by following the steps outlined in this guide, you can ensure a smooth transition without experiencing any downtime or data loss. Remember to back up your website files and database, choose a reliable hosting provider, and test your website thoroughly before updating your DNS and canceling your shared hosting account. With careful planning and execution, you can successfully migrate your website to a new hosting account and enjoy the benefits of improved performance, scalability, and security.

10 Essential Security Features to Look for in a Web Hosting Company

Sticky post

When it comes to choosing a web hosting company, security should be one of your top priorities. With cyber threats becoming more sophisticated every day, it’s essential to ensure that your website and its data are protected from potential attacks. Here are ten essential security features you should look for when selecting a web hosting company:

SSL/TLS Certificates

An SSL/TLS certificate is a must-have for any website. It encrypts the data transmitted between the server and the user’s browser, ensuring that sensitive information such as passwords and credit card details are kept secure. A web hosting company that provides SSL/TLS certificates as part of its package is a good indication of its commitment to security.

A hosting company that accepts cryptocoins as payment can provide greater flexibility and privacy for customers who prefer to use decentralized digital currencies for their online transactions, while also enabling the hosting company to expand its customer base and increase its revenue streams.

Firewall Protection

A firewall is a network security system that monitors and controls incoming and outgoing traffic based on predetermined security rules. It can help prevent unauthorized access to your website and keep your data safe. A web hosting company that provides firewall protection can help ensure that your website is well-protected against attacks.

Malware Scanning and Removal

Malware can infect your website and compromise your data, so it’s crucial to have a system in place that can detect and remove any malicious code. A web hosting company that provides malware scanning and removal services can help keep your website safe from harmful viruses and other malicious software.

DDoS Protection

Distributed Denial of Service (DDoS) attacks can bring down your website by overwhelming it with traffic from multiple sources. A web hosting company that offers DDoS protection can help prevent such attacks from happening and ensure that your website remains accessible to your users.

Backup and Restore Options

Regular backups are essential to ensure that you can restore your website in case of a security breach or data loss. A web hosting company that provides backup and restore options can help ensure that your website’s data is safe and can be restored quickly in case of an emergency.

Two-Factor Authentication

Two-factor authentication adds an extra layer of security to your website by requiring users to provide two forms of identification before they can access your site. A web hosting company that provides two-factor authentication can help ensure that only authorized users can access your website’s sensitive data.

Secure File Transfer Protocol (SFTP)

SFTP is a secure way of transferring files between your computer and the server. It encrypts the data during transmission, ensuring that it can’t be intercepted by unauthorized users. A web hosting company that provides SFTP can help ensure that your data is always safe and secure.

Secure Shell (SSH) Access

SSH is a secure way of accessing your server remotely. It encrypts the connection, ensuring that your login credentials are always protected. A web hosting company that provides SSH access can help ensure that your website’s data and login credentials are kept secure.

Strong Password Policies

Strong password policies can help prevent unauthorized access to your website. A web hosting company that enforces strong password policies can help ensure that your website’s users are using secure passwords that are difficult to guess or crack.

Regular Security Audits and Updates

Regular security audits and updates can help ensure that your website is always protected against the latest threats. A web hosting company that provides regular security audits and updates can help ensure that your website is always up-to-date and protected against the latest security vulnerabilities.

source: youtube.com/@LiquidWebInc

Choosing a web hosting company with robust security features is essential to protect your website and its data from cyber threats. By selecting a web hosting company that offers SSL/TLS certificates, firewall protection, malware scanning and removal, DDoS protection, backup and restore options, two-factor authentication, SFTP, SSH access, strong password policies, and regular security audits and updates, you can rest assured that your website is in good hands.

Backups 101: Understanding Your Hosting Company’s Backup Solutions

In the world of web hosting, backups are a critical component to safeguarding your website’s data. However, not all backup solutions are created equal, and it’s important to understand what your hosting company offers in terms of backups.

In this article, we’ll cover the basics of backups and what you should look for when evaluating your hosting company’s backup solutions.

What Are Backups?

Simply put, backups are copies of your website’s data that are stored in a safe and secure location. These backups serve as a safety net in case something goes wrong with your website, such as a hack or data loss.

There are different types of backups, including full backups, incremental backups, and differential backups. Full backups are a complete copy of your website’s data, while incremental backups only copy the changes made since the last backup, and differential backups copy the changes made since the last full backup.

Why Are Backups Important?

Backups are important for several reasons. Firstly, they allow you to restore your website to a previous state if something goes wrong. For example, if your website is hacked and data is lost, you can use a backup to restore your website to its previous state.

Backups can help you recover from hardware failures or data corruption. If your website’s data becomes corrupted, a backup can be used to restore the data to its correct state.

What Backup Solutions Do Hosting Companies Offer?

Now that we’ve covered the basics of backups, let’s take a look at what backup solutions hosting companies typically offer.

Most hosting companies offer some form of regular backups. This may include daily, weekly, or monthly backups depending on your hosting plan. It’s important to note that while regular backups are important, they may not be frequent enough to prevent data loss in the event of a hack or hardware failure.

Many hosting companies offer on-demand backups. This allows you to manually create a backup of your website’s data whenever you choose. On-demand backups can be useful if you’re making significant changes to your website and want to ensure that you have a recent backup in case something goes wrong.

Another backup solution offered by some hosting companies is offsite backups. Offsite backups are stored in a location separate from your website’s server, providing an extra layer of protection against hardware failures and other issues.

Some hosting companies offer backup retention, which allows you to choose how long your backups are stored. This can be useful if you want to keep backups for a longer period of time for compliance or archival purposes.

source: youtube.com/@Ironorbital

What Should You Look for in a Backup Solution?

When evaluating your hosting company’s backup solutions, there are a few key factors to consider.

You should look at how frequently backups are created. Regular backups are important, but more frequent backups are always better. Some hosting companies may offer hourly backups, which can be useful if your website is frequently updated.

You should also consider the storage location of backups. Offsite backups are generally considered more secure than backups stored on the same server as your website’s data.

You should consider how easy it is to restore backups. Some hosting companies may require you to contact support to restore a backup, while others may allow you to restore backups with a few clicks in your hosting control panel.

Backups are an essential component of website security, and it’s important to understand what your hosting company offers in terms of backup solutions. By evaluating your hosting company’s backup solutions and choosing a plan that fits your needs, you can ensure that your website’s data is always safe and secure.

What Kind of Uptime Guarantee Should You Expect from Your Hosting Company?

If you own a website, uptime is critical to your success. Uptime refers to the amount of time your website is available and accessible to users. It’s essential to choose a reliable hosting company that guarantees a high level of uptime, but what kind of uptime guarantee should you expect from your hosting company?

What is an uptime guarantee?

An uptime guarantee is a promise from your hosting company that your website will be up and running for a certain amount of time. The guarantee is usually expressed as a percentage of uptime over a given period, such as 99.9% uptime per month. Hosting companies offer uptime guarantees to reassure their customers that their websites will be available to users most of the time.

Why is uptime important?

Uptime is essential because it affects your website’s visibility, user experience, and revenue. If your website is frequently down or slow to load, users will quickly become frustrated and move on to another site. This can lead to a loss of traffic, customers, and revenue. Additionally, search engines like Google consider uptime as a ranking factor, so if your website is frequently down, it may affect your SEO and online visibility.

What kind of uptime guarantee should you expect from your hosting company?

A good hosting company should offer an uptime guarantee of at least 99%. This means that your website will be up and running for 99% of the time in a given period, usually a month. Some hosting companies offer even higher guarantees, such as 99.9% or 99.99% uptime. It’s important to note that no hosting company can guarantee 100% uptime because there are always factors outside of their control, such as internet connectivity issues or natural disasters.

When choosing a hosting company, look for one that offers a Service Level Agreement (SLA) that outlines the uptime guarantee and the compensation you’ll receive if the guarantee is not met. For example, some hosting companies offer credits or refunds if your website is down for more than a certain amount of time.

It’s also important to consider the hosting company’s track record. Look for reviews and ratings from other customers to see if they have a history of delivering on their uptime guarantee. If a hosting company has a reputation for frequent downtime, it may be best to look for another provider.

Factors that affect uptime

While hosting companies are responsible for maintaining server uptime, there are factors outside of their control that can affect uptime. Some of these factors include:

  1. Server hardware: The quality and age of the server hardware can affect uptime. Older hardware may be more prone to failures, which can lead to downtime.
  2. Network connectivity: The hosting company’s internet connection can affect uptime. If the connection is slow or unreliable, it can affect your website’s availability.
  3. Maintenance: Hosting companies need to perform routine maintenance on their servers, which can cause temporary downtime. Look for a hosting company that schedules maintenance during off-peak hours to minimize the impact on your website.
  4. Security: A hosting company’s security measures can affect uptime. If their servers are frequently targeted by cyber attacks, it can lead to downtime.
  5. Traffic spikes: If your website experiences a sudden surge in traffic, it can overload the server and cause downtime. Look for a hosting company that can handle traffic spikes and offers scalability options.
source: youtube.com/@Thewebmastercom

Choosing a hosting company with a high uptime guarantee is critical for the success of your website. Look for a hosting company that offers at least 99% uptime and has a track record of delivering on their guarantee. Consider factors such as server hardware, network connectivity, maintenance, security, and traffic spikes when evaluating hosting companies. By choosing a reliable hosting company, you can ensure that your website is available to users when they need it most.

Page 1 of 2

Powered by WordPress & Theme by Anders Norén