Hosting Your Website

How to select a hosting company

10 Essential Security Features to Look for in a Web Hosting Company

Sticky post

When it comes to choosing a web hosting company, security should be one of your top priorities. With cyber threats becoming more sophisticated every day, it’s essential to ensure that your website and its data are protected from potential attacks. Here are ten essential security features you should look for when selecting a web hosting company:

SSL/TLS Certificates

An SSL/TLS certificate is a must-have for any website. It encrypts the data transmitted between the server and the user’s browser, ensuring that sensitive information such as passwords and credit card details are kept secure. A web hosting company that provides SSL/TLS certificates as part of its package is a good indication of its commitment to security.

A hosting company that accepts cryptocoins as payment can provide greater flexibility and privacy for customers who prefer to use decentralized digital currencies for their online transactions, while also enabling the hosting company to expand its customer base and increase its revenue streams.

Firewall Protection

A firewall is a network security system that monitors and controls incoming and outgoing traffic based on predetermined security rules. It can help prevent unauthorized access to your website and keep your data safe. A web hosting company that provides firewall protection can help ensure that your website is well-protected against attacks.

Malware Scanning and Removal

Malware can infect your website and compromise your data, so it’s crucial to have a system in place that can detect and remove any malicious code. A web hosting company that provides malware scanning and removal services can help keep your website safe from harmful viruses and other malicious software.

DDoS Protection

Distributed Denial of Service (DDoS) attacks can bring down your website by overwhelming it with traffic from multiple sources. A web hosting company that offers DDoS protection can help prevent such attacks from happening and ensure that your website remains accessible to your users.

Backup and Restore Options

Regular backups are essential to ensure that you can restore your website in case of a security breach or data loss. A web hosting company that provides backup and restore options can help ensure that your website’s data is safe and can be restored quickly in case of an emergency.

Two-Factor Authentication

Two-factor authentication adds an extra layer of security to your website by requiring users to provide two forms of identification before they can access your site. A web hosting company that provides two-factor authentication can help ensure that only authorized users can access your website’s sensitive data.

Secure File Transfer Protocol (SFTP)

SFTP is a secure way of transferring files between your computer and the server. It encrypts the data during transmission, ensuring that it can’t be intercepted by unauthorized users. A web hosting company that provides SFTP can help ensure that your data is always safe and secure.

Secure Shell (SSH) Access

SSH is a secure way of accessing your server remotely. It encrypts the connection, ensuring that your login credentials are always protected. A web hosting company that provides SSH access can help ensure that your website’s data and login credentials are kept secure.

Strong Password Policies

Strong password policies can help prevent unauthorized access to your website. A web hosting company that enforces strong password policies can help ensure that your website’s users are using secure passwords that are difficult to guess or crack.

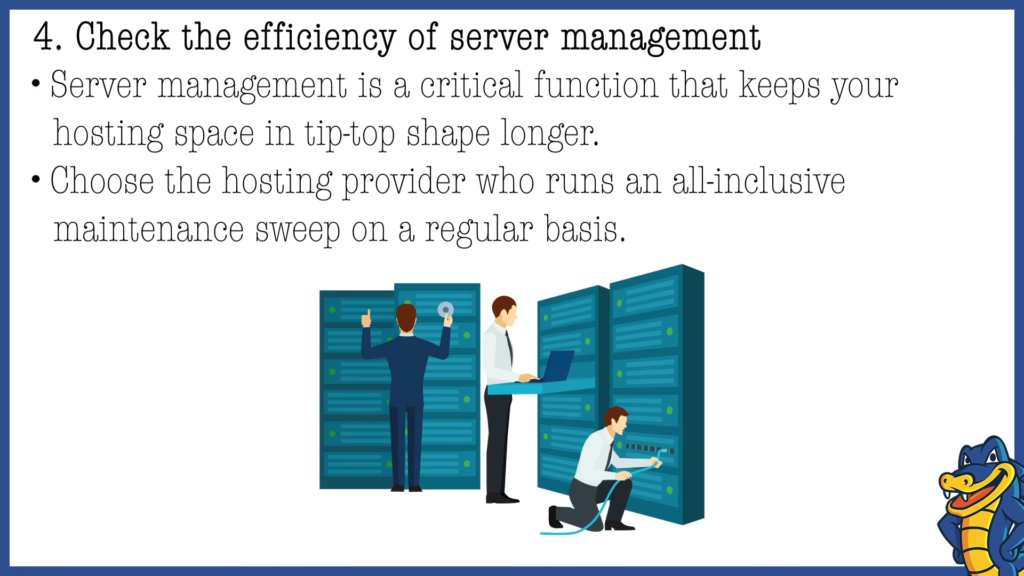
Regular Security Audits and Updates

Regular security audits and updates can help ensure that your website is always protected against the latest threats. A web hosting company that provides regular security audits and updates can help ensure that your website is always up-to-date and protected against the latest security vulnerabilities.

source: youtube.com/@LiquidWebInc

Choosing a web hosting company with robust security features is essential to protect your website and its data from cyber threats. By selecting a web hosting company that offers SSL/TLS certificates, firewall protection, malware scanning and removal, DDoS protection, backup and restore options, two-factor authentication, SFTP, SSH access, strong password policies, and regular security audits and updates, you can rest assured that your website is in good hands.

Migrating to Dedicated Hosting: A Comprehensive Guide for Smooth Transition

When your website outgrows the resources and performance capabilities of shared hosting or VPS hosting, it may be time to consider migrating to dedicated hosting. Dedicated hosting offers a higher level of control, performance, and security by providing a dedicated server exclusively for your website. However, the migration process requires careful planning and execution to ensure a smooth transition without any disruptions to your website’s availability. In this comprehensive guide, we will walk you through the steps involved in migrating to dedicated hosting and provide valuable tips for a successful transition.

Assess Your Needs and Choose the Right Hosting Provider

Before starting the migration process, evaluate your website’s requirements, including resource needs, anticipated traffic growth, and specific server configurations. Research and choose a reliable and reputable dedicated hosting provider that aligns with your needs and offers excellent support.

Backup Your Website and Database

Before proceeding with any migration, it is crucial to create a backup of your website files and databases. This ensures that you have a copy of your data in case of any unforeseen issues during the migration process.

Set Up the Dedicated Server

Work with your hosting provider to set up and configure the dedicated server. This involves choosing the appropriate server specifications, operating system, and control panel. Opt for a managed dedicated hosting solution if you prefer the hosting provider to handle server management tasks.

Transfer Website Files

To migrate your website to the dedicated server, you need to transfer your website files. This can be done using various methods such as FTP (File Transfer Protocol), SFTP (Secure File Transfer Protocol), or SSH (Secure Shell). Connect to your dedicated server using an FTP client, and upload your website files to the appropriate directory.

Migrate Databases

If your website relies on a database, you will need to migrate the database as well. Export the database from your previous hosting environment and import it into the dedicated server’s database management system. This can typically be done using tools like phpMyAdmin or the command line.

Update Configuration Settings

Once your website files and databases are transferred, review and update configuration settings to ensure they are compatible with the new dedicated server environment. This may include updating database connection settings, file paths, and any other server-specific configurations.

Test Website Functionality

Before making the final switch to the dedicated server, thoroughly test your website’s functionality on the new environment. Check for any broken links, missing files, or database connection issues. This will help identify and address any compatibility issues before going live.

Point DNS to the New Server

To direct traffic to the dedicated server, update the DNS (Domain Name System) records of your domain. This involves changing the nameservers or updating the A record to point to the IP address of the dedicated server. DNS propagation may take some time, so plan for a potential downtime during this period.

Monitor and Optimize Performance

After migrating to dedicated hosting, closely monitor the performance of your website. Utilize server monitoring tools to track resource usage, server uptime, and response times. Optimize your website and server settings if necessary to ensure optimal performance.

Maintain Regular Backups

As an ongoing practice, regularly backup your website and databases on the dedicated server. This ensures that you have up-to-date copies of your data and can quickly restore them if needed.

Seek Professional Assistance if Needed

If you are unsure about the migration process or encounter any technical challenges, don’t hesitate to seek professional assistance from your hosting provider or a knowledgeable IT professional. They can provide guidance and support to ensure a successful migration.

source: youtube.com/@teksyndicate

Migrating to dedicated hosting requires careful planning, preparation, and execution. By following this comprehensive guide, you can ensure a smooth and seamless transition to a dedicated server environment. Remember to assess your needs, choose a reliable hosting provider, backup your data, transfer website files and databases, update configuration settings, test website functionality, update DNS records, monitor performance, and maintain regular backups. With proper planning and execution, migrating to dedicated hosting can provide your website with enhanced performance, control, and security, allowing it to thrive in a dedicated server environment.

Selecting the Best Dedicated Hosting Provider: Key Factors to Consider

When it comes to hosting your website on a dedicated server, choosing the right hosting provider is crucial. A reliable and reputable dedicated hosting provider can ensure that your website runs smoothly, remains secure, and provides optimal performance for your users. With numerous options available in the market, it’s essential to consider key factors that will help you make an informed decision. In this article, we will explore the key factors to consider when selecting the best dedicated hosting provider.

Reliability and Uptime

Reliability is of utmost importance when choosing a dedicated hosting provider. Look for providers that offer a strong uptime guarantee, preferably 99.9% or higher. A reliable hosting provider will have redundant network connections, backup power supplies, and robust hardware to minimize any potential downtime.

Performance and Speed

One of the primary benefits of dedicated hosting is the superior performance it offers. Ensure that the hosting provider has state-of-the-art server hardware, including fast processors, ample RAM, and high-speed storage options such as SSDs. Additionally, consider the provider’s network infrastructure and bandwidth capabilities to ensure fast and responsive website loading times.

Scalability Options

Consider your website’s growth potential and whether the hosting provider can accommodate your scalability needs. A good dedicated hosting provider should offer flexible scalability options, allowing you to easily upgrade or add resources as your website traffic and requirements increase.

Technical Support

Dedicated hosting requires technical expertise, and having reliable support from the hosting provider is essential. Evaluate the quality and responsiveness of the provider’s technical support team. Look for providers that offer 24/7 support through multiple channels like live chat, email, and phone. It’s also helpful to check customer reviews and testimonials to gauge the provider’s support quality.

Security Measures

Security is critical when hosting sensitive data or running an e-commerce website. Ensure that the hosting provider offers robust security measures, including firewalls, intrusion detection systems, regular security updates, and DDoS protection. Additionally, check if the provider performs regular backups and offers optional security features like SSL certificates.

Data Center Locations

The geographic location of the data centers is an important consideration, especially if your target audience is concentrated in specific regions. Choose a dedicated hosting provider that has data centers strategically located close to your target audience to reduce latency and improve website loading times.

Control Panel and User Interface

A user-friendly control panel can simplify server management tasks. Consider the control panel provided by the hosting provider and ensure it offers features like server monitoring, resource management, and one-click application installations. Popular control panels include cPanel, Plesk, and DirectAdmin.

Reputation and Customer Reviews

Research the reputation of the hosting provider by reading customer reviews, testimonials, and industry expert opinions. Check if they have a history of reliable service, good customer support, and positive customer experiences. Look for any recurring issues or complaints that might be red flags.

Pricing and Value for Money

While cost should not be the sole determining factor, it’s essential to evaluate the pricing plans offered by the hosting provider. Compare the pricing with the features, resources, and support provided to determine the value for money. Beware of extremely cheap providers that may compromise on quality and support.

Additional Services and Features

Consider any additional services or features offered by the hosting provider. This could include managed services, server monitoring, regular backups, SSL certificates, and more. Evaluate if these additional services align with your specific requirements and if they provide added value to your hosting experience.

source: youtube.com/@snappy2hostforhassle-freew598

Selecting the best dedicated hosting provider requires careful consideration of several key factors. Reliability, performance, scalability, technical support, security measures, data center locations, control panel usability, reputation, pricing, and additional services all play a crucial role in making the right choice. Take the time to research and compare different hosting providers to find the one that best aligns with your website’s needs and goals. By selecting a reputable and reliable dedicated hosting provider, you can ensure a seamless hosting experience and optimal performance for your website.

Is Dedicated Hosting Right for Your Business? Pros and Cons


When it comes to selecting a hosting solution for your business, there are various options available, each with its own set of advantages and considerations. One such option is dedicated hosting, which provides exclusive access to a physical server dedicated solely to your website or application. In this article, we will explore the pros and cons of dedicated hosting to help you determine whether it is the right choice for your business.

Is Dedicated Hosting Right for Your Business? Pros and Cons

Pros of Dedicated Hosting

  1. Enhanced Performance: With dedicated hosting, you have access to the entire server’s resources, including CPU, memory, and disk space. This translates into improved performance and faster loading times for your website or application. Dedicated hosting is particularly beneficial for high-traffic websites or resource-intensive applications that require substantial computing power.
  2. Increased Reliability: Since you have exclusive use of the server, you don’t have to worry about other websites or applications impacting your server’s performance. Dedicated hosting offers greater reliability and stability compared to shared hosting, where the actions of other users can affect your website’s uptime and performance.
  3. Improved Security: Dedicated hosting provides a higher level of security compared to shared hosting. With dedicated hosting, you have full control over security configurations and can implement stringent security measures tailored to your business needs. This includes features like firewalls, intrusion detection systems, and regular security audits.
  4. Scalability: Dedicated hosting allows for easy scalability. As your business grows and your website or application demands increase, you can easily upgrade your server resources to accommodate the additional traffic or workload. This flexibility ensures that your website or application can handle increased user demands without any performance issues.
  5. Customization and Control: Dedicated hosting gives you complete control over server configurations and software installations. You can customize the server environment to meet your specific requirements, install custom applications, and optimize the server settings for maximum performance. This level of control is especially advantageous for businesses with unique hosting needs or specific software requirements.

Cons of Dedicated Hosting

  1. Higher Cost: Dedicated hosting is generally more expensive than other hosting options such as shared hosting or VPS hosting. Since you have exclusive use of the server’s resources, you are responsible for the entire cost of the server, maintenance, and management. This cost can be prohibitive for small businesses or startups with limited budgets.
  2. Technical Expertise Required: Dedicated hosting typically requires technical expertise to manage and maintain the server effectively. You need to have a certain level of server administration knowledge or employ a dedicated IT team to handle server-related tasks, including software updates, security patches, and troubleshooting.
  3. Responsibility for Server Management: With dedicated hosting, you are responsible for managing the server, including tasks like server monitoring, backups, and security configurations. While some hosting providers offer managed dedicated hosting services, they come at an additional cost. If you lack the technical skills or resources to manage the server, dedicated hosting may not be the best option for your business.
  4. Lack of Scalability in the Short Term: While dedicated hosting offers scalability in the long term, it may not be as flexible in the short term. Scaling up a dedicated server requires additional hardware or server migrations, which can involve downtime and additional costs. If your business experiences sudden spikes in traffic or requires frequent scaling, dedicated hosting may not be the most efficient solution.
  5. Complex Setup Process: Setting up a dedicated server requires more time and technical expertise compared to other hosting options. You need to configure the server, install the necessary software, and optimize the server settings to ensure optimal performance. If you are looking for a quick and easy hosting solution, dedicated hosting may not be the ideal choice.
source: youtube.com/@HyveLtd

Dedicated hosting offers numerous benefits such as enhanced performance, increased reliability, improved security, scalability, and customization options. However, it also comes with higher costs, the need for technical expertise, server management responsibilities, potential scalability limitations in the short term, and a more complex setup process. When considering dedicated hosting for your business, carefully evaluate your requirements, budget, technical capabilities, and growth projections to make an informed decision. If your business demands high performance, stringent security, and complete control over the server environment, dedicated hosting can be an excellent choice to support your online presence and growth.

Dedicated Hosting Explained: The Ultimate Hosting Solution

When it comes to hosting your website, there are several options available, each with its own set of features and benefits. One such option is dedicated hosting, which is often considered the ultimate hosting solution for websites with high traffic, complex applications, or specific requirements. In this article, we will delve into the details of dedicated hosting, explaining what it is, how it works, and why it is regarded as the ultimate hosting solution for many businesses.

What is Dedicated Hosting?

Dedicated hosting refers to a hosting arrangement where an entire physical server is dedicated solely to one website or client. Unlike shared hosting, where multiple websites share server resources, dedicated hosting provides exclusive access to all the server’s resources, including CPU, RAM, storage, and bandwidth. This means that the website owner has full control over the server and can customize it to meet their specific requirements.

How Does Dedicated Hosting Work?

In dedicated hosting, a hosting provider leases a physical server to a single client. The client has full administrative access to the server, allowing them to install and configure software, manage security settings, and customize the server environment as needed. The hosting provider takes care of server maintenance, hardware updates, network connectivity, and other infrastructure-related tasks.

Benefits of Dedicated Hosting

  1. Enhanced Performance: With dedicated hosting, you have exclusive access to the server’s resources, ensuring optimal performance for your website. The dedicated server’s robust hardware and high-speed network connectivity enable faster data processing, quicker loading times, and improved overall performance.
  2. Greater Reliability: Shared hosting environments are susceptible to performance fluctuations caused by other websites sharing the same resources. In dedicated hosting, you don’t have to worry about other websites impacting your site’s performance or reliability. You have full control over the server, reducing the risk of unexpected downtime or slowdowns due to neighboring websites.
  3. Increased Security: Security is a top priority for any website owner. With dedicated hosting, you have complete control over server security measures. You can implement advanced security configurations, install custom firewalls, and regularly update security patches to protect your website and sensitive data. Since you are the sole user of the server, the risk of security breaches is significantly reduced.
  4. Customization and Flexibility: Dedicated hosting allows for extensive customization. You can choose the operating system, hardware configurations, and software applications that best suit your website’s requirements. This level of flexibility enables you to optimize the server environment and tailor it specifically to your needs.
  5. Scalability: Dedicated hosting provides scalability to accommodate the growth of your website. As your business expands and website traffic increases, you can easily upgrade the server resources to handle the additional load. With dedicated hosting, you have the ability to scale up or down based on your website’s demands.
  6. Dedicated IP Address: A dedicated hosting plan typically includes a dedicated IP address. This is important if you plan to run certain applications, such as an e-commerce store, where SSL certificates and secure transactions require a dedicated IP.
  7. Technical Support: Dedicated hosting plans often come with dedicated technical support. Hosting providers offer assistance with server management, troubleshooting, and addressing any technical issues that may arise. Having reliable technical support can save you time and effort in managing the server yourself.

Is Dedicated Hosting Right for You?

While dedicated hosting offers numerous advantages, it may not be suitable for every website owner. Consider the following factors when deciding if dedicated hosting is the right choice for you:

  1. Traffic and Resource Requirements: Dedicated hosting is ideal for websites with high traffic volumes, resource-intensive applications, or specialized hosting needs. If your website receives thousands of daily visitors, runs complex scripts, or requires extensive server resources, dedicated hosting is worth considering.
  2. Budget: Dedicated hosting tends to be more expensive than shared hosting or other hosting options. Evaluate your budget and the value you place on the benefits of dedicated hosting. If your website’s requirements justify the cost and you can allocate the necessary funds, dedicated hosting can provide excellent returns on investment.
  3. Technical Expertise: Dedicated hosting gives you full control over the server, which means you need to possess or have access to technical knowledge for server management. If you don’t have the expertise or don’t want to invest time in server administration, you may opt for managed dedicated hosting, where the hosting provider handles the technical aspects for you.

Choosing a Dedicated Hosting Provider

When selecting a dedicated hosting provider, consider the following factors:

  1. Reliability and Uptime: Look for a hosting provider with a proven track record of reliability and high uptime. Check reviews and testimonials to ensure the provider delivers consistent performance and has robust infrastructure.
  2. Scalability Options: Ensure that the hosting provider offers scalability options to accommodate future growth. You should have the flexibility to upgrade server resources easily as your website’s needs increase.
  3. Security Measures: Security is crucial for dedicated hosting. Assess the security measures implemented by the hosting provider, including firewalls, intrusion detection systems, and regular backups. Verify that they have robust protocols in place to protect your data.
  4. Technical Support: Evaluate the quality and availability of technical support provided by the hosting provider. Round-the-clock support, quick response times, and knowledgeable staff are essential for managing any technical issues that may arise.
  5. Service Level Agreement (SLA): Review the SLA offered by the hosting provider, paying attention to guarantees for uptime, support response times, and service quality. Make sure the SLA aligns with your expectations and business requirements.
source: youtube.com/@bluehost

Dedicated hosting is considered the ultimate hosting solution for websites that require high performance, customization, security, and scalability. While it may not be suitable for every website owner, dedicated hosting provides exclusive access to server resources, offering enhanced performance, reliability, and control. Evaluate your website’s needs, budget, and technical expertise to determine if dedicated hosting is the right choice for your online presence. By choosing a reputable hosting provider and tailoring the server environment to your requirements, you can benefit from the advantages of dedicated hosting and provide an optimal experience for your website visitors.

Migrating from Shared Hosting to VPS Hosting: A Step-by-Step Guide

Migrating from shared hosting to VPS (Virtual Private Server) hosting can be a significant milestone for your website. It offers increased control, performance, and scalability. However, the migration process can seem intimidating if you’re unfamiliar with the steps involved. In this step-by-step guide, we will walk you through the process of migrating from shared hosting to VPS hosting, ensuring a smooth and successful transition.

Step 1: Evaluate Your Hosting Needs

Before initiating the migration, assess your hosting requirements. Determine the resources your website needs, such as CPU, RAM, storage, and bandwidth. This evaluation will help you select the appropriate VPS hosting plan that meets your needs and allows room for future growth.

Step 2: Choose a VPS Hosting Provider

Research and select a reliable VPS hosting provider that aligns with your requirements. Consider factors such as uptime guarantees, customer support, server locations, scalability options, and pricing. Read reviews and compare different providers to make an informed decision.

Step 3: Set Up Your VPS Hosting Environment

Once you have chosen a provider, sign up for a VPS hosting plan. The hosting provider will provide you with login credentials and instructions to access your VPS server. Familiarize yourself with the control panel and management tools provided by the hosting provider.

Step 4: Back Up Your Website

Before migrating, it’s crucial to back up your website files, databases, and any other related data. This ensures that you have a copy of your website that can be restored if anything goes wrong during the migration process. Most hosting providers offer backup tools or plugins that simplify this process.

Step 5: Transfer Your Website Files

Next, transfer your website files from the shared hosting server to the VPS server. There are several methods to accomplish this:

  • FTP/SFTP: Use an FTP client (such as FileZilla) to connect to both your shared hosting account and VPS server. Download the website files from the shared hosting account and upload them to the appropriate directory on the VPS server.
  • File Manager: If your shared hosting control panel provides a file manager, you can compress your website files into a single archive (e.g., ZIP) and download it. Then, upload the archive to your VPS server and extract the files.
  • SSH: If you are comfortable with command-line interfaces, you can use Secure Shell (SSH) to connect to both servers and transfer files using commands like SCP or rsync.

Step 6: Migrate Your Databases

If your website relies on databases (e.g., MySQL), you need to migrate them as well. Export your databases from the shared hosting server and import them into the database server on your VPS. Use tools like phpMyAdmin or command-line utilities like mysqldump and MySQL shell to export and import the databases.

Step 7: Update Configuration Settings

Review your website’s configuration files (such as wp-config.php for WordPress) and update the necessary settings to reflect the new server details. Update database connection settings, file paths, and any other relevant configurations to ensure your website functions correctly on the VPS server.

Step 8: Test and Verify Your Website

Before updating DNS records, it’s essential to test your website on the VPS server to ensure everything is working as expected. Access your website using the temporary URL or IP address provided by the hosting provider. Test all functionalities, links, and forms to confirm that your website operates correctly.

Step 9: Update DNS Records

Once you are satisfied with the functionality of your website on the VPS server, it’s time to update your domain’s DNS records. Log in to your domain registrar’s website or contact your domain provider to update the nameservers or DNS settings to point to your new VPS server.

Step 10: Monitor and Optimize

After the migration, closely monitor your website’s performance, resource usage, and user feedback. Optimize your VPS server settings, implement caching mechanisms, and consider content delivery networks (CDNs) to further improve performance and user experience.

source: youtube.com/@Avoiderrors

Migrating from shared hosting to VPS hosting is an important step for website owners seeking more control, performance, and scalability. By following this step-by-step guide, you can ensure a successful migration process. Remember to evaluate your hosting needs, choose a reliable provider, back up your website, transfer files and databases, update configuration settings, test your website, update DNS records, and continuously monitor and optimize your VPS hosting environment. With careful planning and execution, your website will thrive on the enhanced capabilities offered by VPS hosting.

Understanding VPS Hosting: Benefits and Features Explained

In today’s digital landscape, choosing the right web hosting solution is crucial for the success of your website. One popular option that offers a balance between affordability and performance is VPS hosting. Virtual Private Server (VPS) hosting provides users with dedicated resources within a virtualized environment. In this article, we will delve into the world of VPS hosting, exploring its benefits and key features that make it an attractive choice for website owners.

What is VPS Hosting?

VPS hosting involves the use of virtualization technology to divide a physical server into multiple virtual servers. Each virtual server operates independently, with its own dedicated resources, including CPU, RAM, storage, and bandwidth. This means that users get a private and isolated hosting environment within the shared infrastructure of the physical server.

Benefits of VPS Hosting

  1. Enhanced Performance: With VPS hosting, you have access to dedicated resources, ensuring consistent performance for your website. Unlike shared hosting, where resources are shared among multiple users, VPS hosting guarantees a higher level of stability and performance, even during peak traffic periods.
  2. Scalability: VPS hosting offers scalability, allowing you to easily adjust your resources as your website grows. With the ability to upgrade or downgrade resources on-demand, you can scale your hosting plan based on your website’s requirements, ensuring optimal performance at all times.
  3. Improved Security: In VPS hosting, each virtual server operates in isolation from others, providing a higher level of security compared to shared hosting. Your website’s data and resources are protected from the activities of neighboring websites. Additionally, you can implement custom security measures and configurations to further enhance the security of your VPS environment.
  4. Customization and Control: VPS hosting gives you more control over your hosting environment. You have root access or administrative privileges, allowing you to install custom software, configure server settings, and personalize your hosting environment according to your specific needs. This level of customization and control is not available in shared hosting.
  5. Cost-Effective: While VPS hosting may be slightly more expensive than shared hosting, it offers a cost-effective solution for businesses and websites that require dedicated resources without the high costs associated with dedicated hosting. The ability to scale resources and pay for what you need makes VPS hosting a flexible and affordable option.

Key Features of VPS Hosting

  1. Root Access: VPS hosting provides root access or administrative privileges, giving you complete control over the server. You can install and configure software, modify server settings, and manage security measures according to your requirements.
  2. Dedicated Resources: Each virtual server in VPS hosting comes with dedicated resources, including CPU power, RAM, storage, and bandwidth. These resources are not shared with other users, ensuring consistent performance and eliminating the risk of resource contention.
  3. Operating System Choices: VPS hosting allows you to choose your preferred operating system (OS). Whether it’s Linux-based distributions like Ubuntu, CentOS, or Debian, or Windows Server, you have the flexibility to select the OS that best suits your needs and technical expertise.
  4. Server Management: Depending on your level of technical expertise, you can opt for managed or unmanaged VPS hosting. Managed VPS hosting comes with server management services, including regular updates, security patches, and monitoring, leaving you free to focus on your website. Unmanaged VPS hosting requires you to handle server management tasks yourself.
  5. Multiple Domain Hosting: VPS hosting allows you to host multiple websites or domains on a single server. This feature is particularly beneficial for businesses or individuals managing multiple websites or running reseller hosting services.
  6. Backup and Disaster Recovery: VPS hosting providers often offer backup and disaster recovery solutions to safeguard your data. Regular backups and the ability to restore your website quickly in case of any unforeseen incidents provide peace of mind and data protection.
source: youtube.com/@scalahosting5432

VPS hosting combines the affordability of shared hosting with the performance and flexibility of dedicated hosting. Its benefits, including enhanced performance, scalability, improved security, customization options, and cost-effectiveness, make it an attractive choice for businesses and individuals seeking a robust hosting solution. With dedicated resources, control over the hosting environment, and the ability to scale resources as needed, VPS hosting empowers website owners to create and maintain high-performing websites that can adapt to their evolving needs.

Managed vs. Unmanaged VPS Hosting: Which Option is Right for You?

When it comes to hosting your website on a Virtual Private Server (VPS), you have two primary options to choose from: managed VPS hosting and unmanaged VPS hosting. Both options offer their own set of advantages and considerations, and deciding which one is right for you depends on your technical expertise, available time, and specific hosting requirements. In this article, we will explore the differences between managed and unmanaged VPS hosting, highlighting their features, benefits, and factors to consider to help you make an informed decision.

Managed VPS Hosting

Managed VPS hosting is a fully supported hosting solution where the hosting provider takes care of the technical aspects of server management. This includes server setup, software installations, security updates, server monitoring, backups, and troubleshooting. With managed VPS hosting, you can focus on managing and growing your website, while the hosting provider handles the server-related tasks.

Benefits of Managed VPS Hosting

  1. Technical Support: Managed VPS hosting provides access to a team of technical experts who can assist you with server-related issues and answer your hosting-related queries promptly. This support can be invaluable, especially if you lack technical expertise or prefer to offload server management responsibilities.
  2. Server Management: The hosting provider handles essential server management tasks, such as software updates, security patches, and performance optimizations. This ensures that your VPS is always up to date, secure, and optimized for performance.
  3. Time Savings: With managed VPS hosting, you can save valuable time that would otherwise be spent on server setup, configuration, and maintenance. This allows you to focus on other aspects of your business, such as website development, content creation, and marketing.
  4. Enhanced Security: Managed VPS hosting providers often implement robust security measures, including firewalls, malware scanning, and intrusion detection systems, to protect your server and website from potential threats. Regular security audits and proactive monitoring help ensure a secure hosting environment.
  5. Scalability: Managed VPS hosting providers typically offer scalable solutions, allowing you to easily upgrade your resources as your website grows. They can assist in seamlessly increasing server capacity, ensuring that your website can handle increased traffic and demands.

Factors to Consider for Managed VPS Hosting

  1. Cost: Managed VPS hosting tends to be more expensive compared to unmanaged hosting due to the additional support and management services provided by the hosting provider. Consider your budget and the value you place on the convenience of having experts manage your server.
  2. Technical Control: Managed VPS hosting limits your access to server configurations and settings. While the hosting provider takes care of essential tasks, you may have limited control over customizing certain aspects of the server environment. Ensure that the level of control provided by the managed hosting provider aligns with your specific requirements.

Unmanaged VPS Hosting

Unmanaged VPS hosting, also known as self-managed VPS hosting, puts the responsibility of server management squarely on your shoulders. With unmanaged hosting, you are responsible for server setup, software installations, security updates, backups, and ongoing maintenance. This option is ideal for those with technical expertise and the desire for full control over their hosting environment.

Benefits of Unmanaged VPS Hosting

  1. Complete Control: With unmanaged VPS hosting, you have full root access and administrative control over the server. You can customize the server configurations, install any software of your choice, and optimize the server environment according to your specific needs.
  2. Cost Savings: Unmanaged VPS hosting is typically cheaper than managed hosting since you take on the responsibility of server management. If you have the technical knowledge and the time to handle server-related tasks, unmanaged hosting can be a cost-effective option.
  3. Flexibility: Unmanaged VPS hosting allows you to tailor the server environment to your unique requirements. You have the freedom to choose the operating system, software stack, and configurations that best suit your website’s needs.

Factors to Consider for Unmanaged VPS Hosting

  1. Technical Expertise: Unmanaged VPS hosting requires a certain level of technical knowledge and expertise. You should be comfortable with server management tasks, including server setup, software installations, security configurations, and troubleshooting. If you lack technical skills, unmanaged hosting may not be the right choice for you.
  2. Time and Resources: Managing an unmanaged VPS hosting environment requires time and effort. You need to allocate resources to handle server maintenance, updates, security patches, and backups. Consider whether you have the available time and manpower to effectively manage the server on an ongoing basis.
  3. Support: With unmanaged VPS hosting, you are responsible for resolving any server-related issues that may arise. While some hosting providers offer basic support, it may not cover advanced troubleshooting or application-specific problems. Ensure that you have access to adequate support resources or the ability to handle issues independently.

Making the Decision

Choosing between managed and unmanaged VPS hosting ultimately depends on your technical expertise, available time, and specific hosting requirements. Here are some scenarios where each option might be more suitable:

Managed VPS Hosting is a good fit if

  • You lack technical expertise or don’t have the time to manage server-related tasks.
  • You prefer to focus on your website or business growth instead of server management.
  • You value the convenience of having technical support and experts handle server-related issues.
  • Your budget allows for the additional cost of managed hosting services.

Unmanaged VPS Hosting is a good fit if

  • You have the necessary technical knowledge and skills to manage a server independently.
  • You require full control and customization capabilities for your server environment.
  • You are comfortable taking on the responsibility of server maintenance, updates, and security measures.
  • You are budget-conscious and prefer to save costs by managing the server yourself.
source: youtube.com/@DomainRacerVideos

Managed and unmanaged VPS hosting each have their own merits and considerations. Understanding your technical capabilities, available resources, and hosting requirements is crucial in making the right choice. If you’re unsure, it’s recommended to start with managed VPS hosting and assess your needs over time. Remember, your hosting needs may evolve as your website grows, and you can always switch between managed and unmanaged hosting based on your changing requirements.

How to Set Up and Configure Your VPS Hosting Environment

Setting up and configuring a VPS hosting environment can seem like a daunting task, especially if you are new to virtual private servers. However, with the right guidance and knowledge, the process becomes much more manageable. In this article, we will walk you through the steps to set up and configure your VPS hosting environment effectively.

Step 1: Choose a Reliable VPS Hosting Provider

The first step in setting up your VPS hosting environment is selecting a reputable hosting provider. Look for providers that offer reliable hardware, excellent customer support, and a variety of plans to suit your needs. Compare features, pricing, and user reviews to make an informed decision.

Step 2: Select the Right Operating System

Once you have chosen a hosting provider, you will need to select the operating system (OS) for your VPS. Popular options include Linux distributions like Ubuntu, CentOS, and Debian, as well as Windows Server for Windows-based environments. Consider your familiarity with the OS and the requirements of your website or application when making your choice.

Step 3: Provision Your VPS

After selecting the OS, your hosting provider will provision your VPS. This involves allocating the necessary resources such as CPU, memory, storage, and bandwidth to your virtual server. The provisioning process may take a few minutes or longer, depending on the provider.

Step 4: Access Your VPS

Once your VPS is provisioned, you will need to access it. Most hosting providers provide a control panel or a web-based interface to manage your VPS. Additionally, you can connect to your VPS using secure shell (SSH) for Linux-based servers or Remote Desktop Protocol (RDP) for Windows-based servers.

Step 5: Update and Secure Your VPS

Immediately after gaining access to your VPS, it is crucial to update the system to ensure it is running the latest software versions and security patches. Use the package manager for your chosen OS to update all installed packages.

Next, enhance the security of your VPS by changing the default passwords, disabling root or administrator remote login, and configuring a firewall to allow only necessary incoming connections. Regularly install security updates and consider implementing additional security measures such as fail2ban, intrusion detection systems, or virtual private networks (VPNs).

Step 6: Install and Configure Necessary Software

Depending on your website or application requirements, you will need to install and configure the necessary software on your VPS. This may include a web server like Apache or Nginx, a database server like MySQL or PostgreSQL, and any additional software frameworks or tools required by your website or application.

Follow the documentation or tutorials provided by the software developers or hosting provider to correctly install and configure the software. Ensure that you optimize the software settings for performance and security, taking into account the resources available on your VPS.

Step 7: Set Up Domain and DNS

To make your website accessible, you will need to set up your domain and configure the domain name system (DNS) settings. This involves registering a domain name and pointing it to your VPS’s IP address. Your hosting provider should provide instructions or a control panel to help you manage your domain and DNS settings.

Step 8: Configure Backup and Monitoring

Implementing regular backups and monitoring is essential for the reliability and security of your VPS hosting environment. Set up automated backup systems to create regular backups of your data and configurations. Consider utilizing off-site storage or cloud backup solutions for added protection.

Implement monitoring tools to track the performance, resource usage, and uptime of your VPS. This helps you identify potential issues and take timely actions to optimize and maintain your hosting environment.

Step 9: Test and Optimize

Before launching your website or application, thoroughly test its functionality, performance, and security on your VPS. Perform load testing to ensure it can handle expected traffic levels. Monitor its performance and make necessary optimizations to enhance speed and responsiveness.

Regularly review your VPS configuration and make adjustments as needed. Stay updated with the latest security best practices and software updates to protect your VPS from vulnerabilities.

source: youtube.com/@TonyTeachesTech

Setting up and configuring your VPS hosting environment requires careful planning and execution. By following these steps, you can establish a reliable and secure VPS hosting environment to host your website or application. Remember to choose a reputable hosting provider, secure your VPS, install necessary software, configure domains and DNS, implement backup and monitoring systems, and continuously test and optimize your VPS for optimal performance.

Shared Hosting: The Most Affordable Way to Host Your Website

source: pexels.com/@pixabay

When it comes to hosting a website, there are various options available, each with its own advantages and cost considerations. Shared hosting is often touted as the most affordable way to host a website, especially for individuals, small businesses, and startups. In this article, we will delve into the details of shared hosting and explore why it is considered the most cost-effective solution for hosting your website.

What is Shared Hosting?

Shared hosting is a type of web hosting where multiple websites are hosted on a single physical server. Each website on the server shares the server’s resources, such as CPU, memory, and disk space. This setup allows hosting providers to offer hosting services at a lower cost since the cost is divided among multiple users.

Why Shared Hosting is Affordable?

  1. Cost Sharing: Shared hosting providers can offer their services at a significantly lower cost compared to other hosting options due to the cost-sharing nature of shared hosting. The overall cost of the server and its maintenance is divided among multiple users, making it an economical choice for individuals and small businesses with budget constraints.
  2. Maintenance and Support: With shared hosting, the hosting provider is responsible for server maintenance, hardware upgrades, and security measures. This eliminates the need for individual users to invest in technical expertise or hire dedicated IT staff to manage and maintain the server. The cost of these maintenance tasks is absorbed by the hosting provider, reducing the overall cost for shared hosting users.
  3. Infrastructure: Shared hosting providers typically have a robust infrastructure in place to support multiple websites. They invest in high-performance servers, network connections, and data centers, spreading the cost across all shared hosting accounts. This allows users to benefit from reliable infrastructure without the need for significant upfront investments.
  4. Basic Features and Resources: Shared hosting plans often include a range of basic features necessary for hosting a website, such as a user-friendly control panel, email accounts, FTP access, and database management tools. While advanced features may be limited, shared hosting plans provide ample resources for most small to medium-sized websites, including disk space and bandwidth, at an affordable price point.
  5. Easy Setup and Management: Shared hosting is designed to be user-friendly, even for those without technical expertise. Hosting providers offer intuitive control panels and one-click installers for popular content management systems (CMS) like WordPress, Joomla, or Drupal. This simplifies the website setup process, allowing users to launch their websites quickly and easily.

Factors to Consider

While shared hosting offers affordability, there are a few factors to consider before choosing shared hosting for your website:

  1. Resource Limitations: Since resources are shared among multiple websites, there can be limitations on CPU usage, memory allocation, and concurrent connections. While these limitations are typically sufficient for small to medium-sized websites with moderate traffic, resource-intensive websites may experience performance issues on shared hosting plans.
  2. Performance Variability: Shared hosting can experience performance fluctuations if other websites on the same server experience high traffic or resource usage. This can impact the loading speed of your website during peak traffic periods. However, reputable hosting providers employ resource allocation techniques to minimize the impact of resource-intensive websites on other users.
  3. Security: Shared hosting poses some security risks as multiple websites are hosted on the same server. If one website is compromised, there is a potential for other websites on the server to be affected. However, hosting providers implement security measures such as firewalls, malware scanning, and account isolation to mitigate these risks and ensure the security of shared hosting environments.

Tips for Maximizing the Value of Shared Hosting:

To make the most out of shared hosting while keeping costs low, consider the following tips:

  1. Optimize Your Website: Implement performance optimization techniques like caching, image compression, and code optimization to reduce the load on the server and improve website performance.
  2. Monitor Resource Usage: Regularly monitor your website’s resource usage to identify any spikes or bottlenecks. Optimize your website and consider upgrading your plan if you consistently exceed the allocated resources.
  3. Utilize Content Delivery Networks (CDNs): CDNs help distribute your website’s static content across multiple servers globally, reducing the load on the shared hosting server and improving page load times for visitors from different geographical locations.
  4. Backup Regularly: While shared hosting providers typically offer backups, it’s advisable to maintain your own backups to ensure the safety of your website’s data. Regularly back up your website to an external location or a cloud storage service.
source: youtube.com/@DigitalNomadInstitute

Shared hosting is indeed the most affordable way to host your website. It offers a cost-effective solution for individuals, small businesses, and startups to establish their online presence without breaking the bank. While shared hosting has some limitations, proper optimization, monitoring, and adherence to best practices can help you maximize the value of shared hosting and ensure a reliable and efficient hosting environment for your website.

How to Scale Your Website on a Shared Hosting Plan

Scaling a website is a crucial step in accommodating increased traffic, improving performance, and ensuring a positive user experience. While shared hosting may have resource limitations compared to other hosting options, it is still possible to scale your website effectively within a shared hosting plan. In this article, we will explore the various strategies and best practices to scale your website on a shared hosting plan.

Optimize Your Website

Before scaling your website, it’s essential to optimize it for maximum efficiency. This includes:

  • Compressing and optimizing images to reduce file sizes.
  • Enabling browser caching to store static files locally on visitors’ devices.
  • Minifying CSS and JavaScript files to reduce their size.
  • Implementing caching mechanisms, such as using a content delivery network (CDN) or a caching plugin, to store and serve static content.

Use a Content Delivery Network (CDN)

A CDN can significantly improve the performance of your website by caching and delivering your content from servers located strategically around the world. This reduces the load on your shared hosting server and improves page load times for visitors across different geographical locations.

Enable GZIP Compression

Enabling GZIP compression on your shared hosting server can reduce the size of files sent to visitors’ browsers, resulting in faster page load times. Most shared hosting providers offer GZIP compression as a built-in feature or can assist you in enabling it.

Opt for a Performance-Oriented Theme/Framework

Choose a lightweight and performance-oriented theme or framework for your website. Avoid heavy themes with excessive features and functionalities that can slow down your site. Opt for themes that are optimized for speed and follow best practices for performance.

Implement Caching

Caching can significantly improve the performance of your website. Many shared hosting providers offer caching solutions, such as server-level caching or plugins like WP Super Cache or W3 Total Cache. Implementing caching can reduce the server load and speed up your website.

Utilize a Content Delivery Network (CDN)

Integrating your shared hosting plan with a CDN can distribute your website’s static files to servers worldwide, reducing the load on your hosting server and improving global page load times. Many CDN providers offer easy integration options and have plugins available for popular CMS platforms.

Optimize Your Database

Regularly optimize your website’s database to improve its performance. This includes removing unnecessary data, optimizing database tables, and using an efficient database management system.

Monitor Resource Usage

Keep an eye on your website’s resource usage, such as CPU, memory, and bandwidth. Many shared hosting providers offer resource monitoring tools or provide resource usage data in their control panels. By monitoring resource usage, you can identify potential bottlenecks and take necessary actions to optimize and scale your website.

Utilize Caching Plugins

Caching plugins can store static versions of your website’s pages, reducing the load on your shared hosting server. Popular caching plugins like WP Rocket, W3 Total Cache, or WP Super Cache offer features such as page caching, object caching, and minification to improve performance.

Consider Upgrading to a Higher Shared Hosting Plan

If your website continues to grow and experiences increased traffic beyond the capabilities of your current shared hosting plan, consider upgrading to a higher-tier shared hosting plan. This can provide you with additional resources and better performance while remaining within the shared hosting environment.

Optimize Database Queries

Review and optimize your website’s database queries to ensure they are efficient and not putting unnecessary strain on your shared hosting server. Analyze slow queries and consider optimizing them, adding indexes where necessary, or using query caching techniques.

Leverage Browser Caching

Configure your shared hosting server to instruct visitors’ browsers to cache static resources like images, CSS, and JavaScript files. This way, returning visitors don’t need to download these files again, resulting in faster page load times.

Utilize a Load Balancer

If your shared hosting provider offers load balancing capabilities, consider implementing a load balancer to distribute traffic evenly across multiple servers. This can help handle increased traffic and improve the overall performance of your website.

Enable Opcode Caching

Opcode caching can significantly improve the performance of PHP-based websites. It stores precompiled PHP code in the server’s memory, reducing the time taken to execute PHP scripts. Check if your shared hosting provider supports opcode caching and enable it if available.

Consider a Virtual Private Server (VPS) Hosting

If your website continues to grow and you require more control and resources, consider upgrading to a VPS hosting plan. VPS hosting provides a dedicated portion of a server with more resources and greater scalability than shared hosting, allowing you to scale your website more effectively.

source: youtube.com/@hostgatorUS

While shared hosting may have some resource limitations, there are several strategies and best practices you can implement to scale your website effectively within a shared hosting plan. By optimizing your website, utilizing caching techniques, integrating with a CDN, and monitoring resource usage, you can improve performance, handle increased traffic, and provide a positive user experience. If your website continues to outgrow shared hosting, upgrading to a higher-tier shared hosting plan or considering VPS hosting can offer more resources and scalability.

Page 1 of 4

Powered by WordPress & Theme by Anders Norén